Examples cookbook: Custom services and controllers
The content of this page might not be fully up-to-date with Strapi 5 yet.
This page is part of the back end customization examples cookbook. Please ensure you've read its introduction.
From the front-end website of FoodAdvisor, you can browse a list of restaurants accessible at `localhost:3000/restaurants`. Clicking on any restaurant from the list will use the code included in the /client folder to display additional information about this restaurant. The content displayed on a restaurant page was created within Strapi's Content Manager and is retrieved by querying Strapi's REST API which uses code included in the /api folder.
This page will teach about the following advanced topics:
| Topic | Section |
|---|---|
| Create a component that interacts with the backend of Strapi | REST API queries from the front-end |
| Understand how services and controllers can play together | Controllers vs. services |
| Create custom services |
|
| Use services in a controller | Custom controller |
REST API queries from the front end
💭 Context:
Restaurant pages on the front-end website of FoodAdvisor include a Reviews section that is read-only. Adding reviews requires logging in to Strapi's admin panel and adding content to the "Reviews" collection type through the Content Manager.
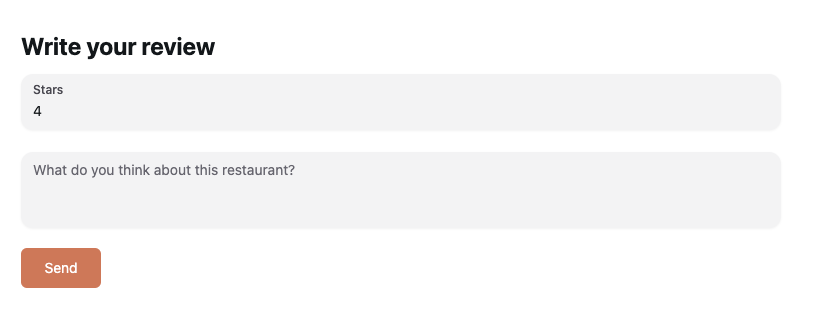
Let's add a small front-end component to restaurant pages. This component will allow a user to write a review directly from the front-end website.
🎯 Goals:
- Add a form to write a review.
- Display the form on any restaurants page.
- Send a POST request to Strapi's REST API when the form is submitted.
- Use the previously stored JWT to authenticate the request.
Additional information on endpoints for content types can be found in the REST API documentation.
🧑💻 Code example:
In the /client folder of the FoodAdvisor project, you could use the following code examples to:
- create a new
pages/restaurant/RestaurantContent/Reviews/new-review.jsfile, - and update the existing
components/pages/restaurant/RestaurantContent/Reviews/reviews.js.
Example front-end code to add a component for writing reviews and display it on restaurants pages:
- Create a new file in the
/clientfolder to add a new component for writing reviews with the following code:
import { Button, Input, Textarea } from '@nextui-org/react';
import { useFormik } from 'formik';
import { useRouter } from 'next/router';
import React from 'react';
import { getStrapiURL } from '../../../../../utils';

const NewReview = () => {
  const router = useRouter();

  const { handleSubmit, handleChange, values } = useFormik({
    initialValues: {
      note: '',
      content: '',
    },
    onSubmit: async (values) => {
      /**
       * Queries Strapi REST API to reach the reviews endpoint
       * using the JWT previously stored in localStorage to authenticate
       */
      const res = await fetch(getStrapiURL('/reviews'), {
        method: 'POST',
        body: JSON.stringify({
          restaurant: router.query.slug,
          ...values,
        }),
        headers: {
          Authorization: `Bearer ${localStorage.getItem('token')}`,
          'Content-Type': 'application/json',
        },
      });
    },
  });
  /**
   * Renders the form
   */
  return (
    <div className="my-6">
      <h1 className="font-bold text-2xl mb-3">Write your review</h1>
      <form onSubmit={handleSubmit} className="flex flex-col gap-y-4">
        <Input
          onChange={handleChange}
          name="note"
          type="number"
          min={1}
          max={5}
          label="Stars"
        />
        <Textarea
          name="content"
          onChange={handleChange}
          placeholder="What do you think about this restaurant?"
        />
        <Button
          type="submit"
          className="bg-primary text-white rounded-md self-start"
        >
          Send
        </Button>
      </form>
    </div>
  );
};

export default NewReview;
- Display the new form component on any restaurants page by adding the highlighted lines (7, 8, and 13) to the code used to render restaurant's information:
import React from 'react';
import delve from 'dlv';

import { formatDistance } from 'date-fns';

import { getStrapiMedia } from '../../../../../utils';
import { Textarea } from '@nextui-org/react';
import NewReview from './new-review';

const Reviews = ({ reviews }) => {
  return (
    <div className="col-start-2 col-end-2 mt-24">
      <NewReview />
      {reviews &&
        reviews.map((review, index) => (
  // …
Controllers vs. Services
Controllers could contain any business logic to be executed when the client requests a route. However, as your code grows bigger and becomes more structured, it is a best practice to split the logic into specific services that do only one thing well, then call the services from controllers.
To illustrate the use of services, in this documentation the custom controller does not handle any responsibilities and delegates all the business logic to services.
Let's say we would like to customize the back end of FoodAdvisor to achieve the following scenario: when submitting the previously added review form on the front-end website, Strapi will create a review in the back end and notify the restaurant owner by email. Translating this to Strapi back end customization means performing 3 actions:
- Creating a custom service to create the review.
- Creating a custom service to send an email.
- Customizing the default controller provided by Strapi for the Review content-type to use the 2 new services.
Custom service: Creating a review
💭 Context:
By default, service files in Strapi includes basic boilerplate code that use the createCoreService factory function.
Let's update the existing review.js service file for the "Reviews" collection type of FoodAdvisor by replacing its code to create a review.
🎯 Goals:
- Declare a
createmethod. - Grab context from the request.
- Use the
findMany()method from the EntityService API to find a restaurant. - Use the
create()method from the EntityService API to append data to the restaurant, populating the restaurant owner. - Return the new review data.
Additional information can be found in the request context, services and EntityService API documentation.
🧑💻 Code example:
To create such a service, in the /api folder of the FoodAdvisor project, replace the content of the src/api/review/services/review.js file with the following code:
const { createCoreService } = require('@strapi/strapi').factories;

module.exports = createCoreService('api::review.review', ({ strapi }) => ({
  async create(ctx) {
    const user = ctx.state.user;
    const { body } = ctx.request;

    /**
     * Queries the Restaurants collection type
     * using the Entity Service API
     * to retrieve information about the restaurant.
     */
    const restaurants = await strapi.entityService.findMany(
      'api::restaurant.restaurant',
      {
        filters: {
          slug: body.restaurant,
        },
      }
    );

    /**
     * Creates a new entry for the Reviews collection type
     * and populates data with information about the restaurant's owner
     * using the Entity Service API.
     */
    const newReview = await strapi.entityService.create('api::review.review', {
      data: {
        note: body.note,
        content: body.content,
        restaurant: restaurants[0].id,
        author: user.id,
      },
      populate: ['restaurant.owner'],
    });

    return newReview;
  },
}));
- In a controller's code, the
createmethod from this service can be called withstrapi.service('api::review.review').create(ctx)wherectxis the request's context. - The provided example code does not cover error handling. You should consider handling errors, for instance when the restaurant does not exist. Additional information can be found in the Error handling documentation.
Custom Service: Sending an email to the restaurant owner
💭 Context:
Out of the box, FoodAdvisor does not provide any automated email service feature.
Let's create an email.js service file to send an email. We could use it in a custom controller to notify the restaurant owner whenever a new review is created on the front-end website.
This service is an advanced code example using the Email plugin and requires understanding how plugins and providers work with Strapi. If you don't need an email service to notify the restaurant's owner, you can skip this part and jump next to the custom controller example.
- You have setup a provider for the Email plugin, for instance the Sendmail provider.
- In Strapi's admin panel, you have created an
Emailsingle type that contains afromText field to define the sender email address.

🎯 Goals:
- Create a new service file for the "Email" single type,
- Declare a
send()method for this service, - Grab the sender address stored in the Email single type using the Entity Service API,
- Use email details (recipient's address, subject, and email body) passed when invoking the service's
send()method to send an email using the Email plugin and a previously configured provider.
Additional information can be found in the Services, Entity Service API and Email feature documentation.
🧑💻 Code example:
To create such a service, in the /api folder of the FoodAdvisor project, create a new src/api/email/services/email.js file with the following code:
const { createCoreService } = require('@strapi/strapi').factories;

module.exports = createCoreService('api::email.email', ({ strapi }) => ({
  async send({ to, subject, html }) {
    /**
     * Retrieves email configuration data
     * stored in the Email single type
     * using the Entity Service API.
     */
    const emailConfig = await strapi.entityService.findOne(
      'api::email.email',
      1
    );

    /**
     * Sends an email using:
     * - parameters to pass when invoking the service
     * - the 'from' address previously retrieved with the email configuration
     */
    await strapi.plugins['email'].services.email.send({
      to,
      subject,
      html,
      from: emailConfig.from,
    });
  },
}));
In a controller's code, the send method from this email service can be called with strapi.service('api::email.email).send(parameters) where parameters is an object with the email's related information (recipient's address, subject, and email body).
Custom controller
💭 Context:
By default, controllers files in Strapi includes basic boilerplate code that use the createCoreController factory function. This exposes basic methods to create, retrieve, update, and delete content when reaching the requested endpoint. The default code for the controllers can be customized to perform any business logic.
Let's customize the default controller for the "Reviews" collection type of FoodAdvisor with the following scenario: upon a POST request to the /reviews endpoint, the controller calls previously created services to both create a review and send an email to the restaurant's owner.
🎯 Goals:
- Extend the existing controller for the "Reviews" collection type.
- Declare a custom
create()method. - Call previously created service(s).
- Sanitize the content to be returned.
Additional information can be found in the controllers documentation.
🧑💻 Code example:
In the /api folder of the FoodAdvisor project, replace the content of the src/api/review/controllers/review.js file with one of the following code examples, depending on whether you previously created just one custom service or both custom services for the review creation and the email notification:
- Custom controller without email service
- Custom controller with email service
const { createCoreController } = require('@strapi/strapi').factories;

module.exports = createCoreController('api::review.review', ({ strapi }) => ({
  /**
   * As the controller action is named
   * exactly like the original `create` action provided by the core controller,
   * it overwrites it.
   */
  async create(ctx) {
    // Creates the new review using a service
    const newReview = await strapi.service('api::review.review').create(ctx);

    const sanitizedReview = await this.sanitizeOutput(newReview, ctx);

    ctx.body = sanitizedReview;
  },
}));
const { createCoreController } = require('@strapi/strapi').factories;

module.exports = createCoreController('api::review.review', ({ strapi }) => ({
  /**
   * As the controller action is named
   * exactly like the original `create` action provided by the core controller,
   * it overwrites it.
   */
  async create(ctx) {
    // Creates the new review using a service
    const newReview = await strapi.service('api::review.review').create(ctx);

    // Sends an email to the restaurant's owner, using another service
    if (newReview.restaurant?.owner) {
      await strapi.service('api::email.email').send({
        to: newReview.restaurant.owner.email,
        subject: 'You have a new review!',
        html: `You've received a ${newReview.note} star review: ${newReview.content}`,
      });
    }

    const sanitizedReview = await this.sanitizeOutput(newReview, ctx);

    ctx.body = sanitizedReview;
  },
}));
Learn more about how custom policies can help you tweak a Strapi-based application and restrict access to some resources based on specific conditions.