Releases
Page summary:
Releases group entries into publishable batches to trigger simultaneous publish or unpublish actions across content types and locales. Instructions in this documentation detail creating releases, adding entries, and understanding plan limitations.
The Releases feature enables content managers to organize entries into containers that can perform publish and unpublish actions simultaneously. A release can contain entries from different content types and can mix locales.
Configuration
To be able to include your content in releases, and to schedule and publish those releases, you must first create them. You can also modify the releases' default timezone to use when scheduling a publication, as well as deleting releases that are obsolete or irrelevant.
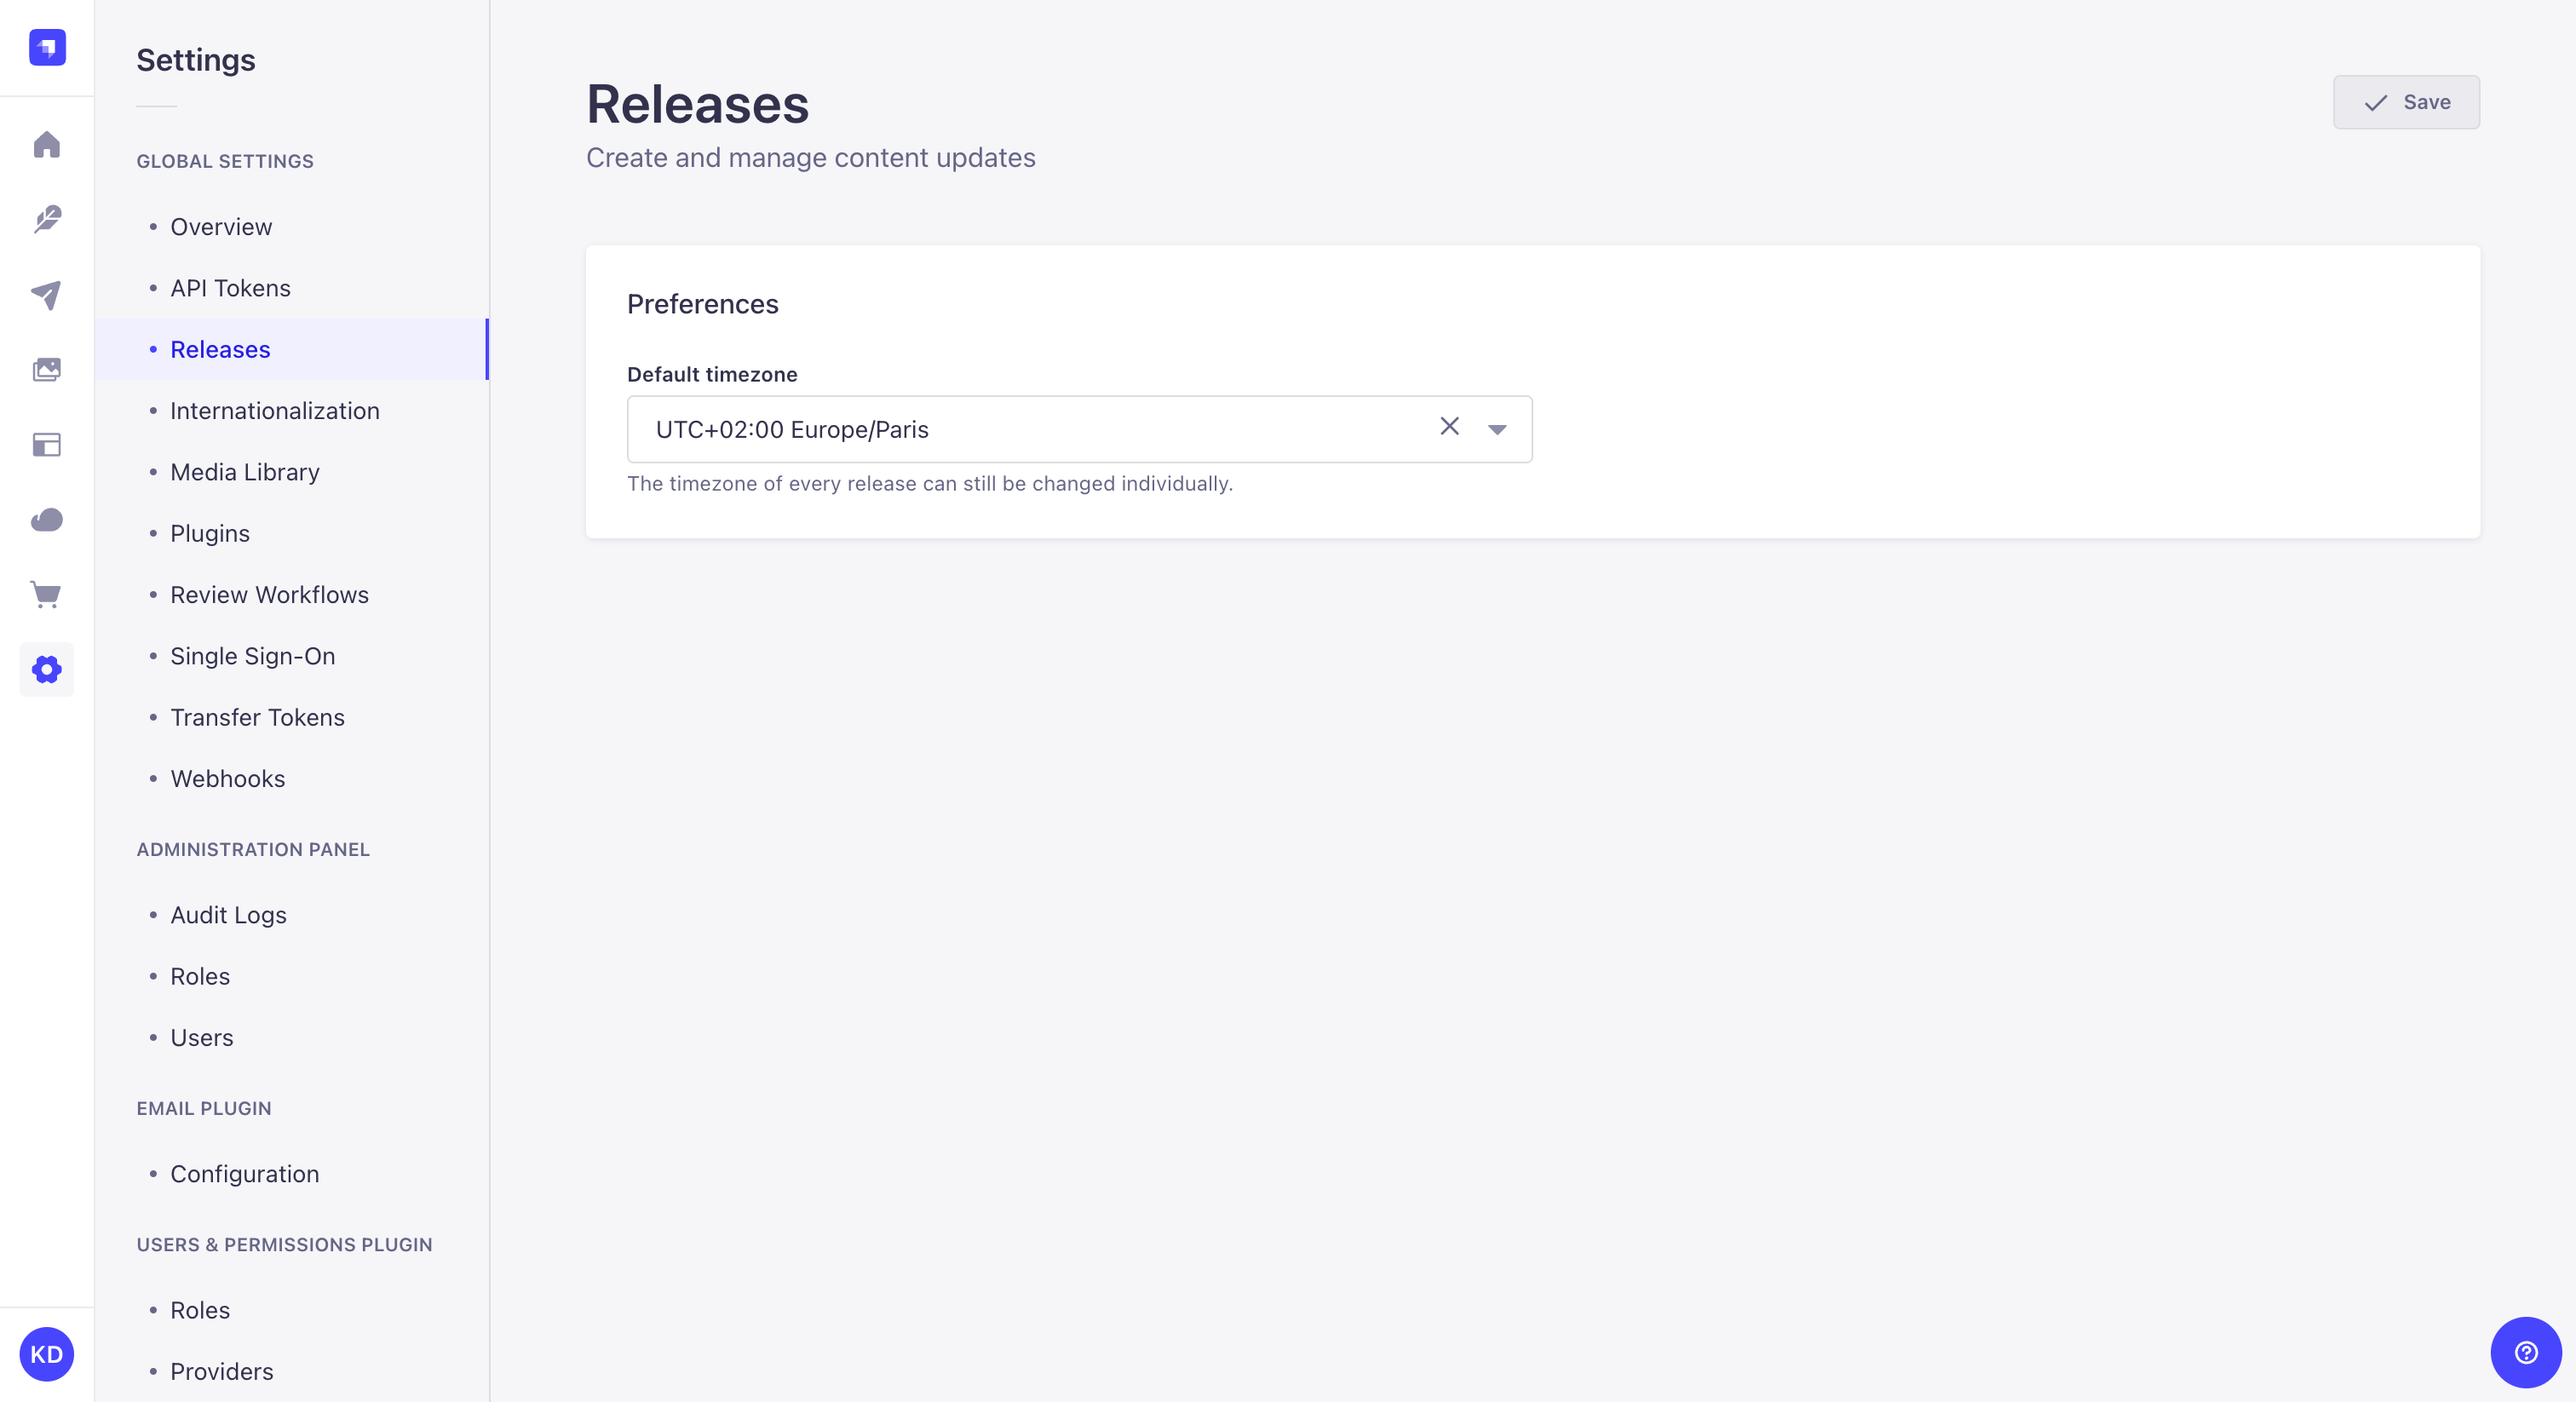
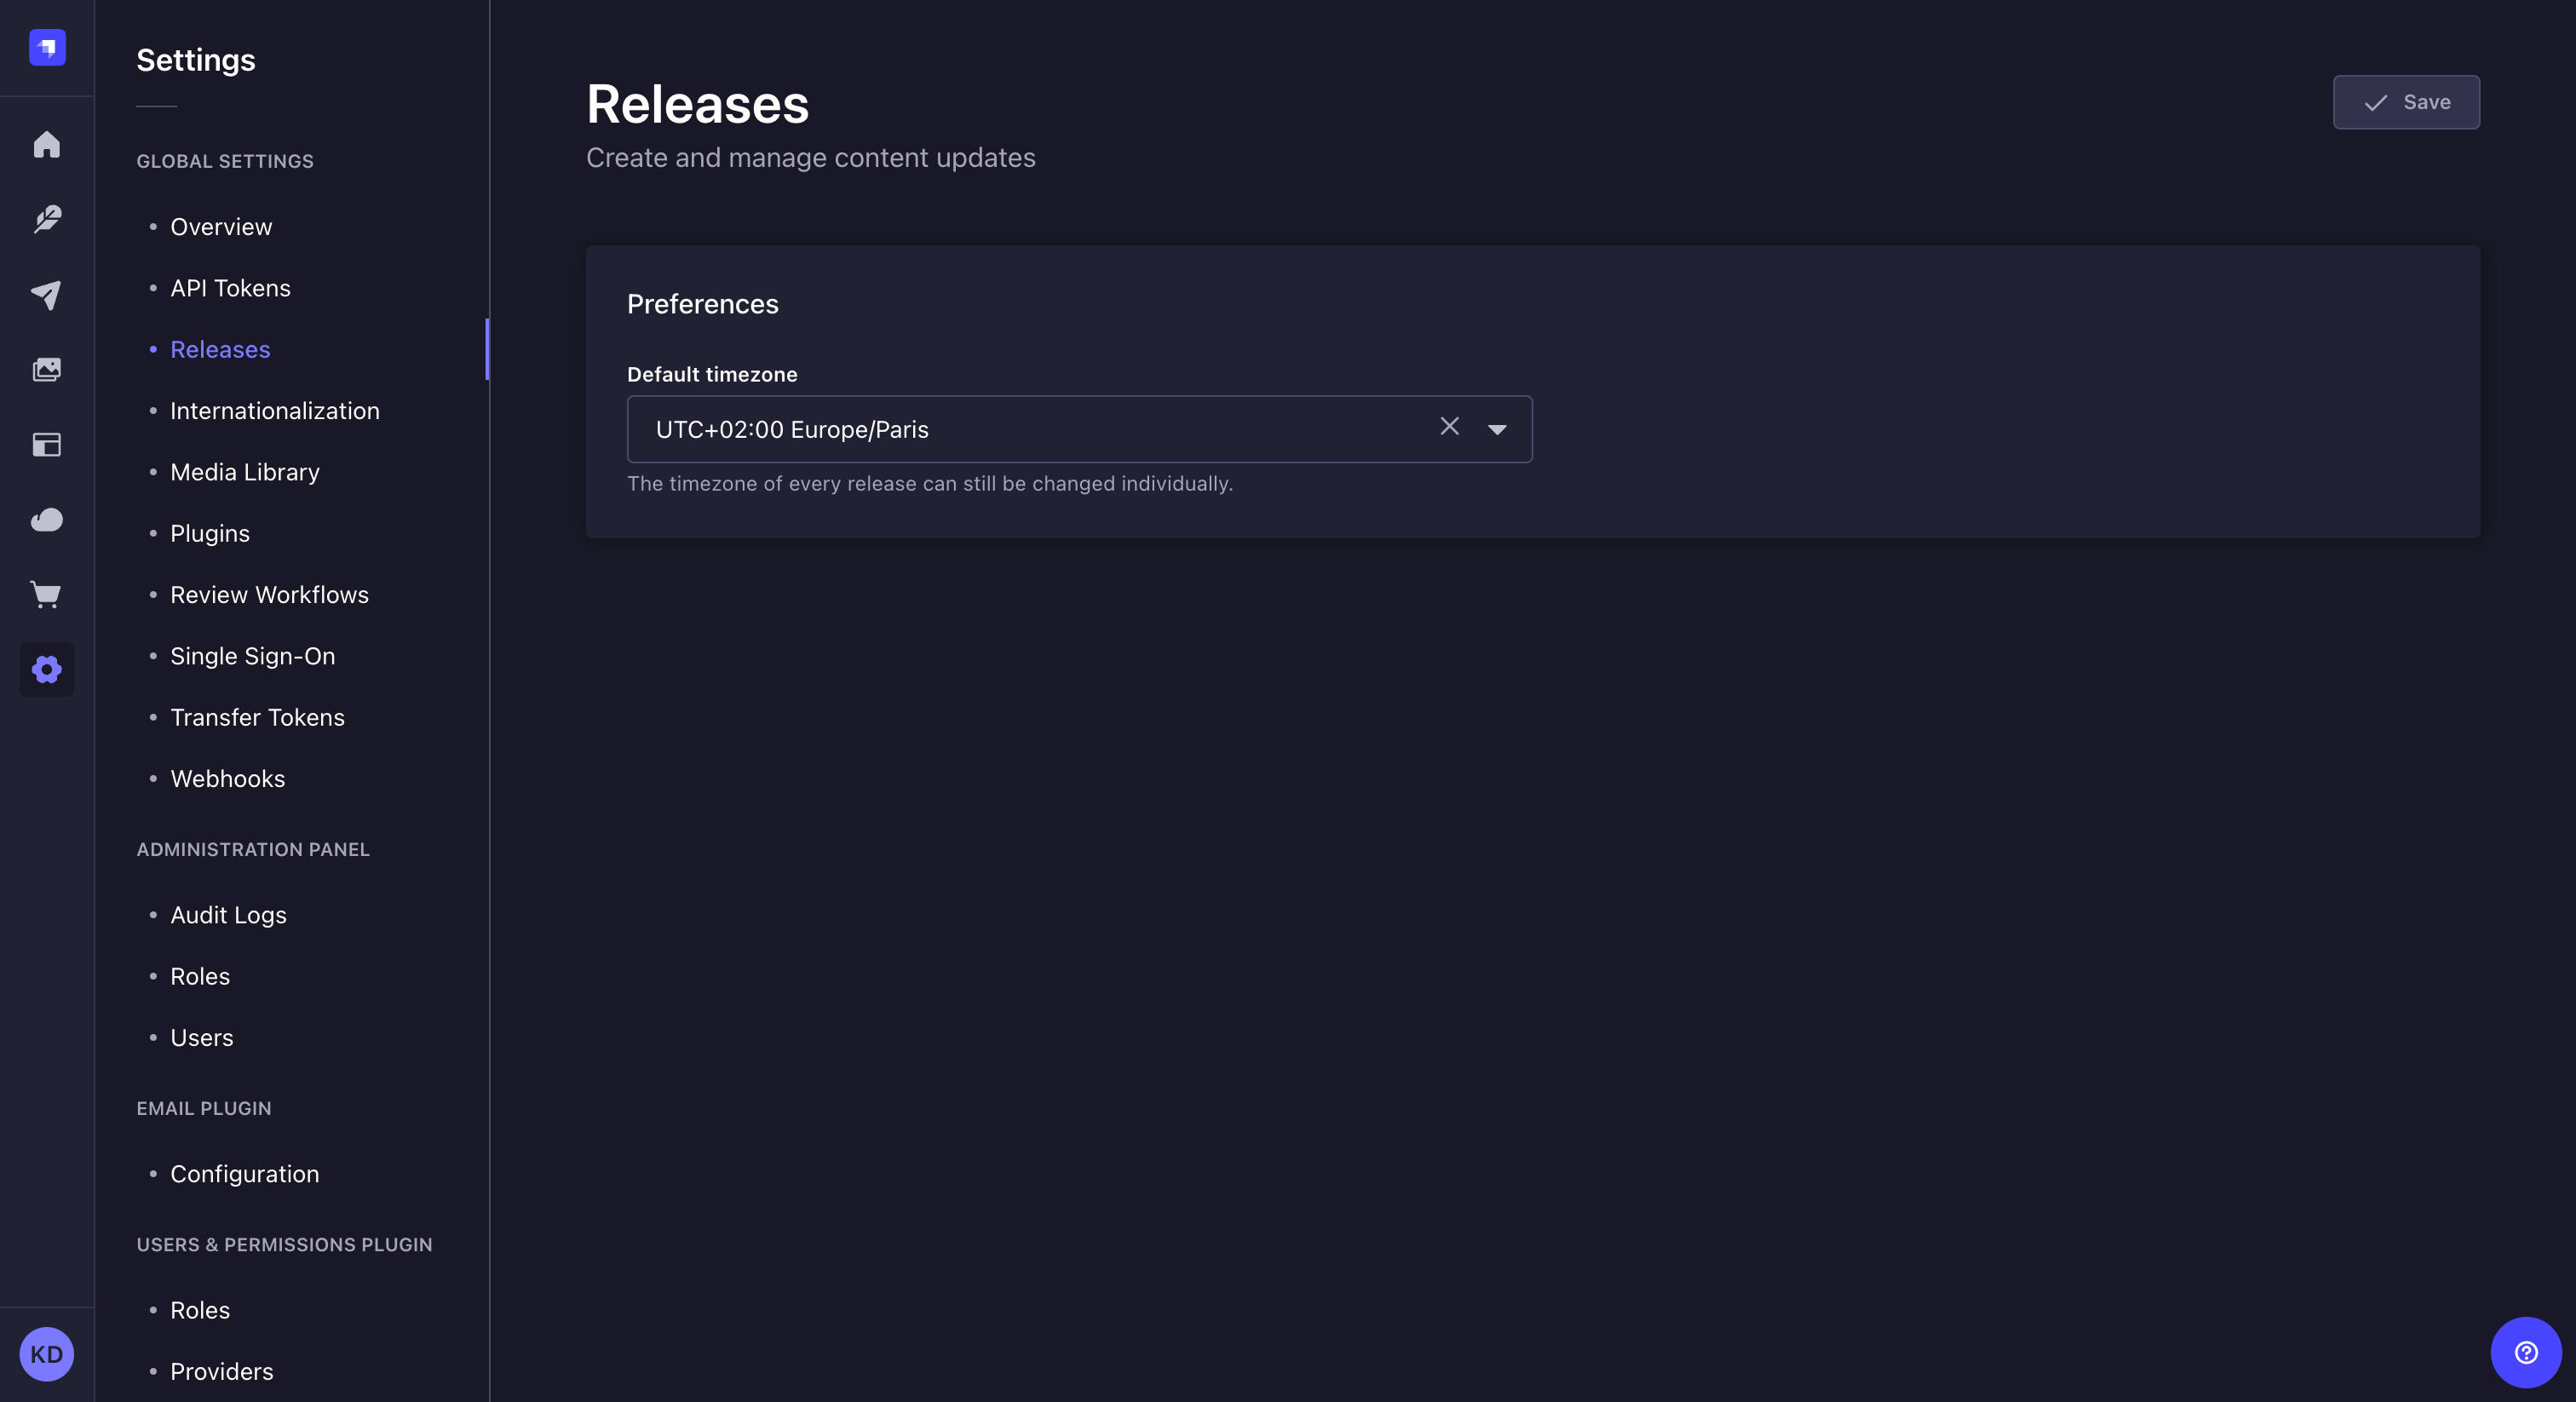
Choosing default timezone
Path to configure the feature: Settings
- Click on the Default timezone dropdown list and choose the default timezone to use.
- Click Save.
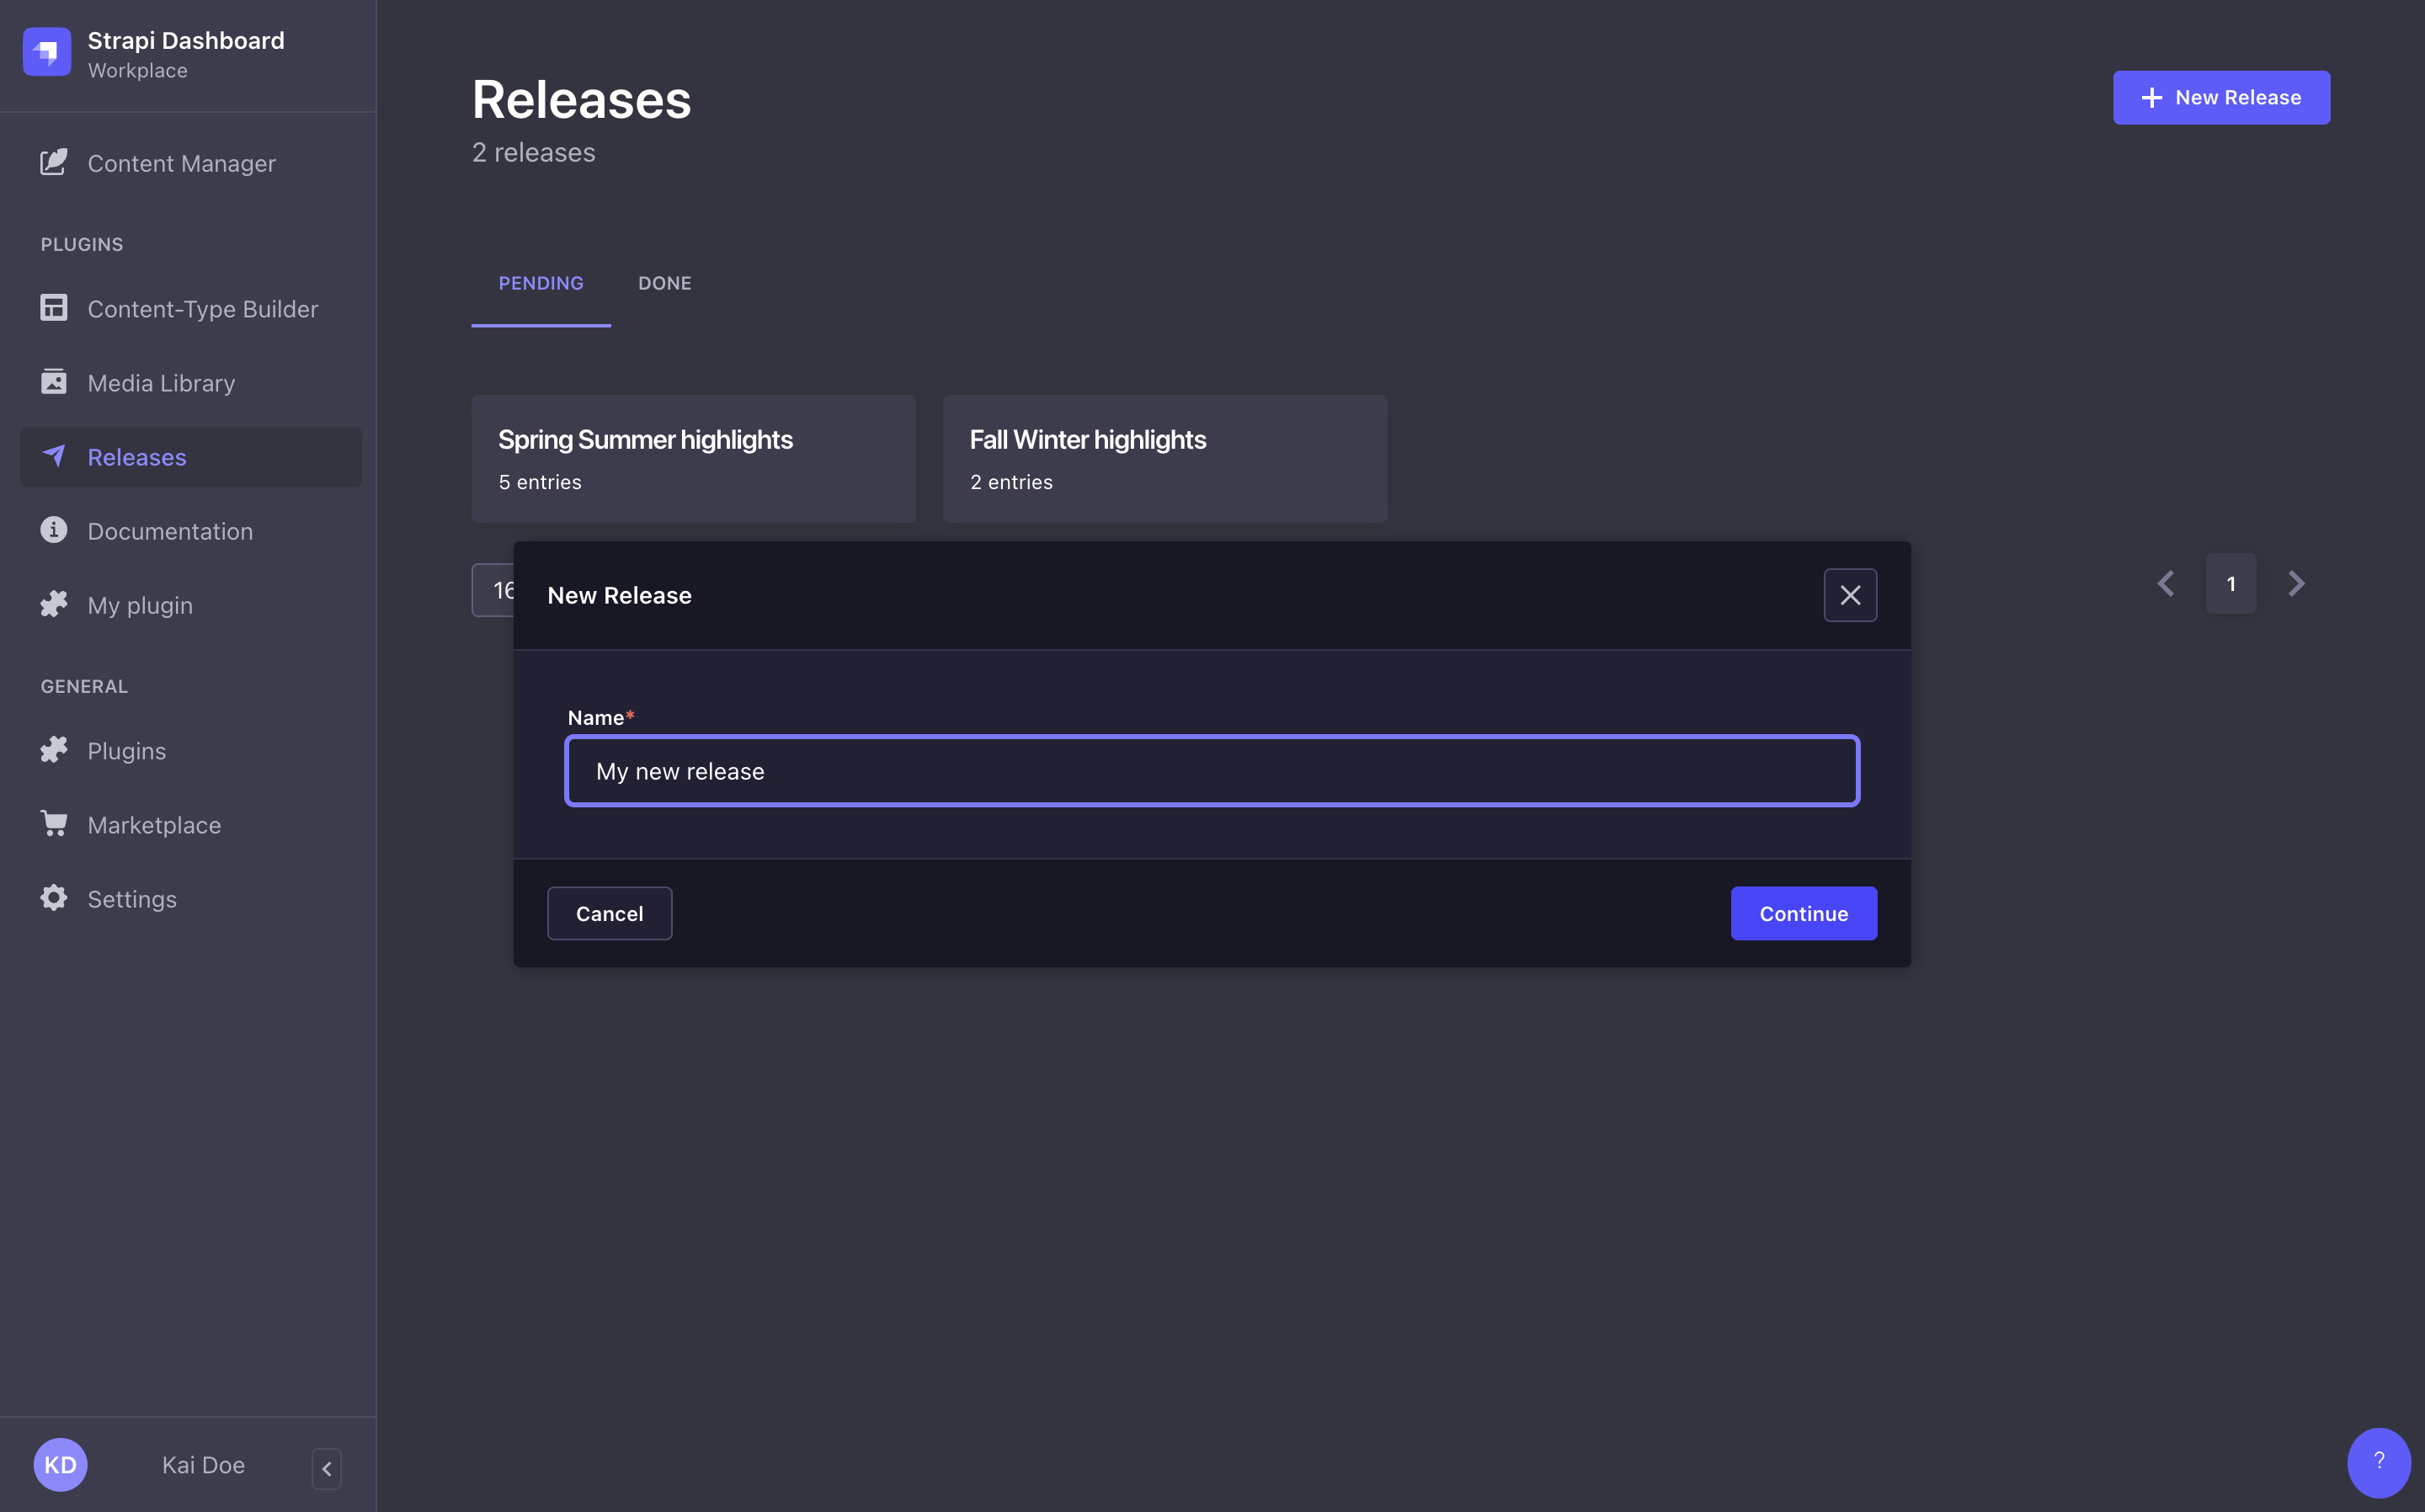
Creating a release
Path to configure the feature: Releases
- Click the New Release button in the upper right corner.
- Give the release a name.
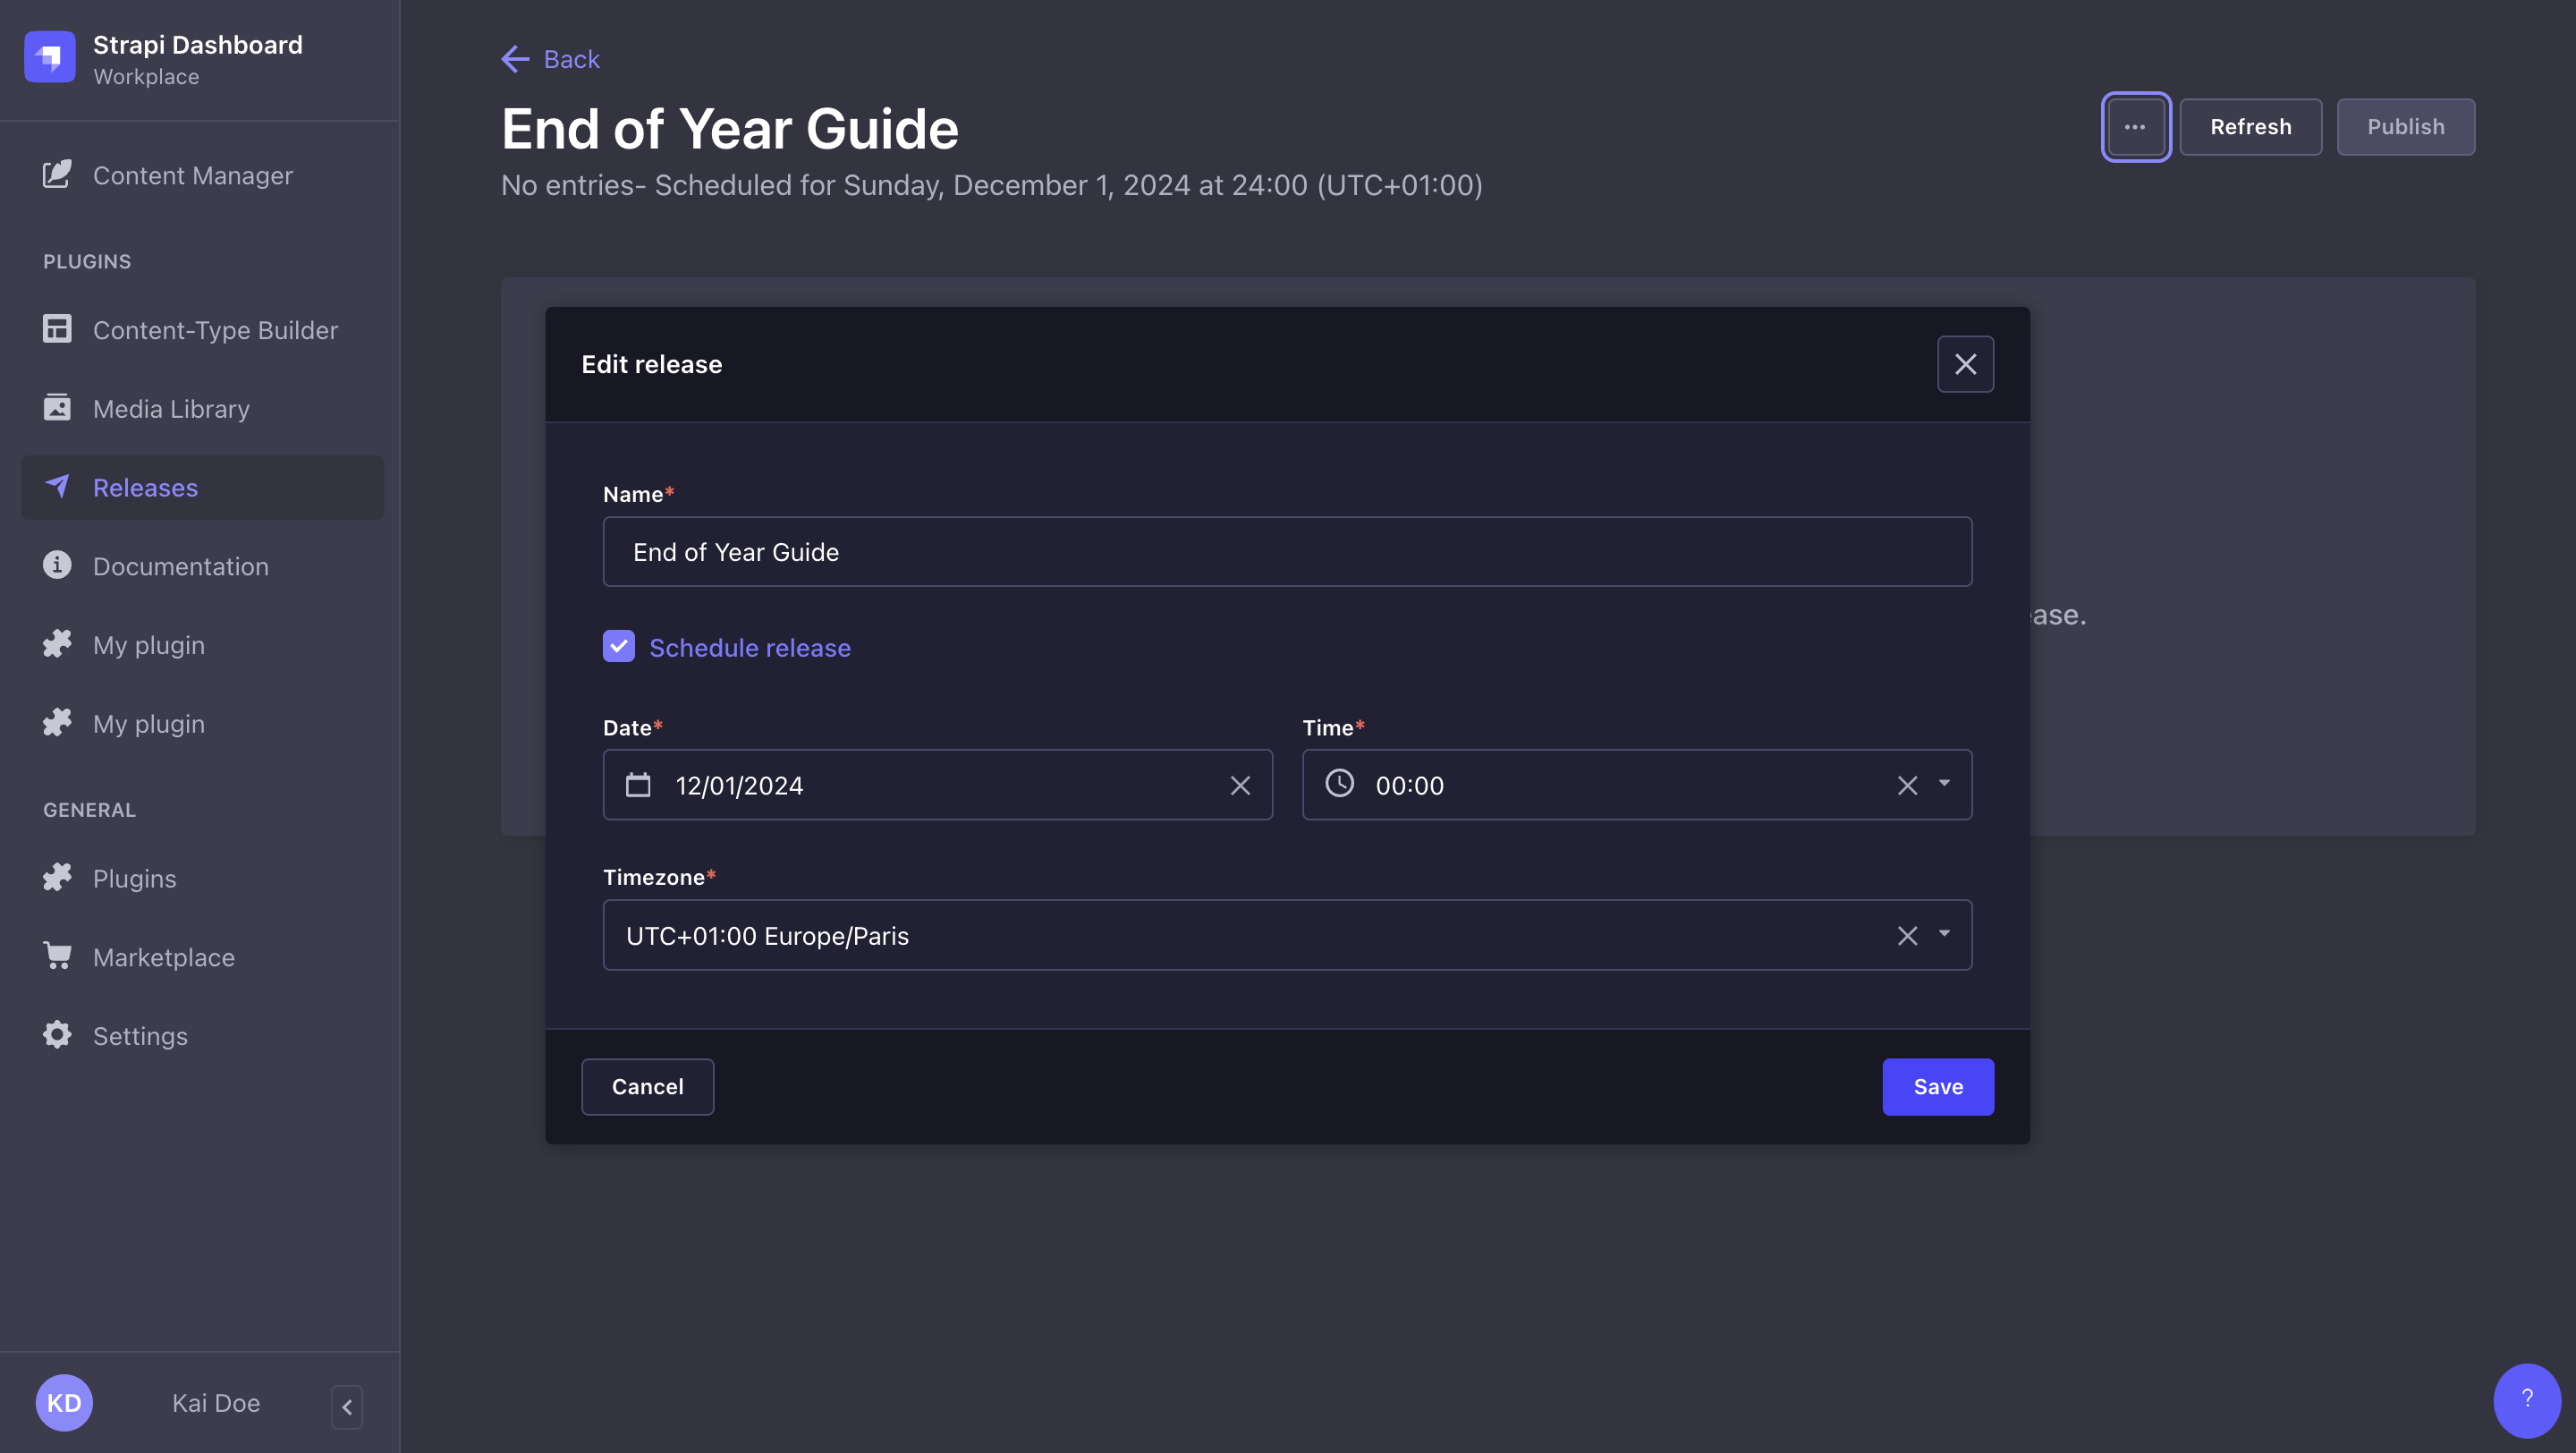
- (optional) If you want to schedule the release publication instead of publishing the release manually, check the Schedule release checkbox and define the date, time, and timezone for publication.
- Click the Continue button.
Your releases can be renamed afterwards, by editing the release using the then Edit buttons.

Deleting a release
Path: Releases
Deleting a release will only delete the release itself, but not the content-type entries included in the release.
- Click on the button in the top right corner of the admin panel.
- Select Delete.
- In the confirmation dialog, click Confirm.
Usage
Path to use the feature: Releases and Content Manager
Since publishing an entry with a release means turning a draft entry into a published entry, Releases will not work if Draft & Publish is disabled for the content-type.
Including content in a release
- Before entries can be added to a release, you must create a release from the Releases page.
- Adding content to a release requires the appropriate permissions for the Content-Releases plugin (see configuring administrator roles).
One entry at a time
Path: Edit view of the Content Manager
- Click on in the Entry area on the right side of the interface.
- In the list, click on the Add to release button.
- Select which release to add this entry to.
- Click on the Publish or Unpublish button depending on whether you want the entry to be published or unpublished when the release itself is published, then click Continue.
The Releases box on the right should show which release(s) the entry is included in.
If Releases scheduling is enabled and the entry is added to a scheduled release, the release date and time will also be displayed.
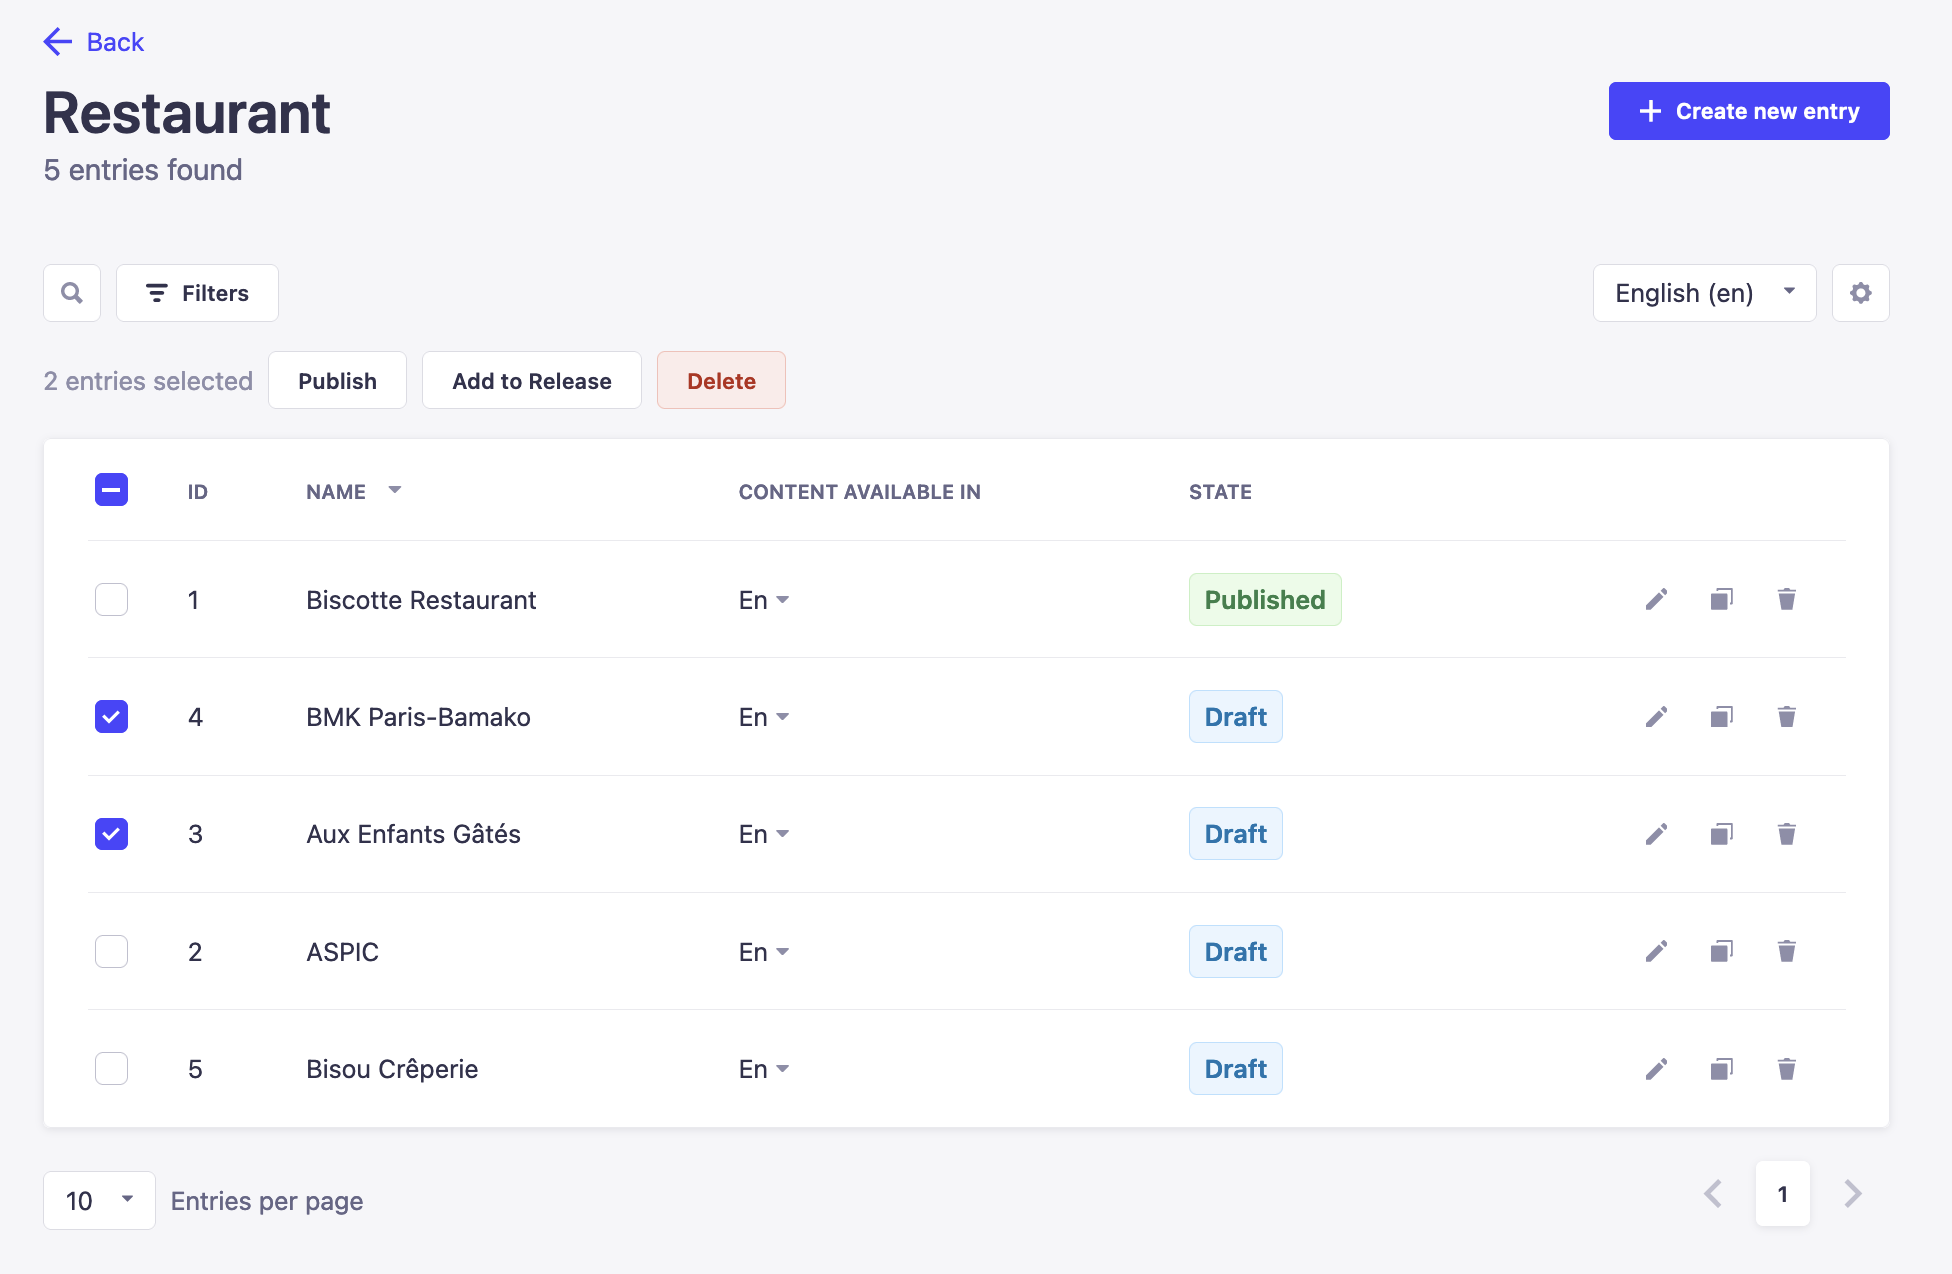
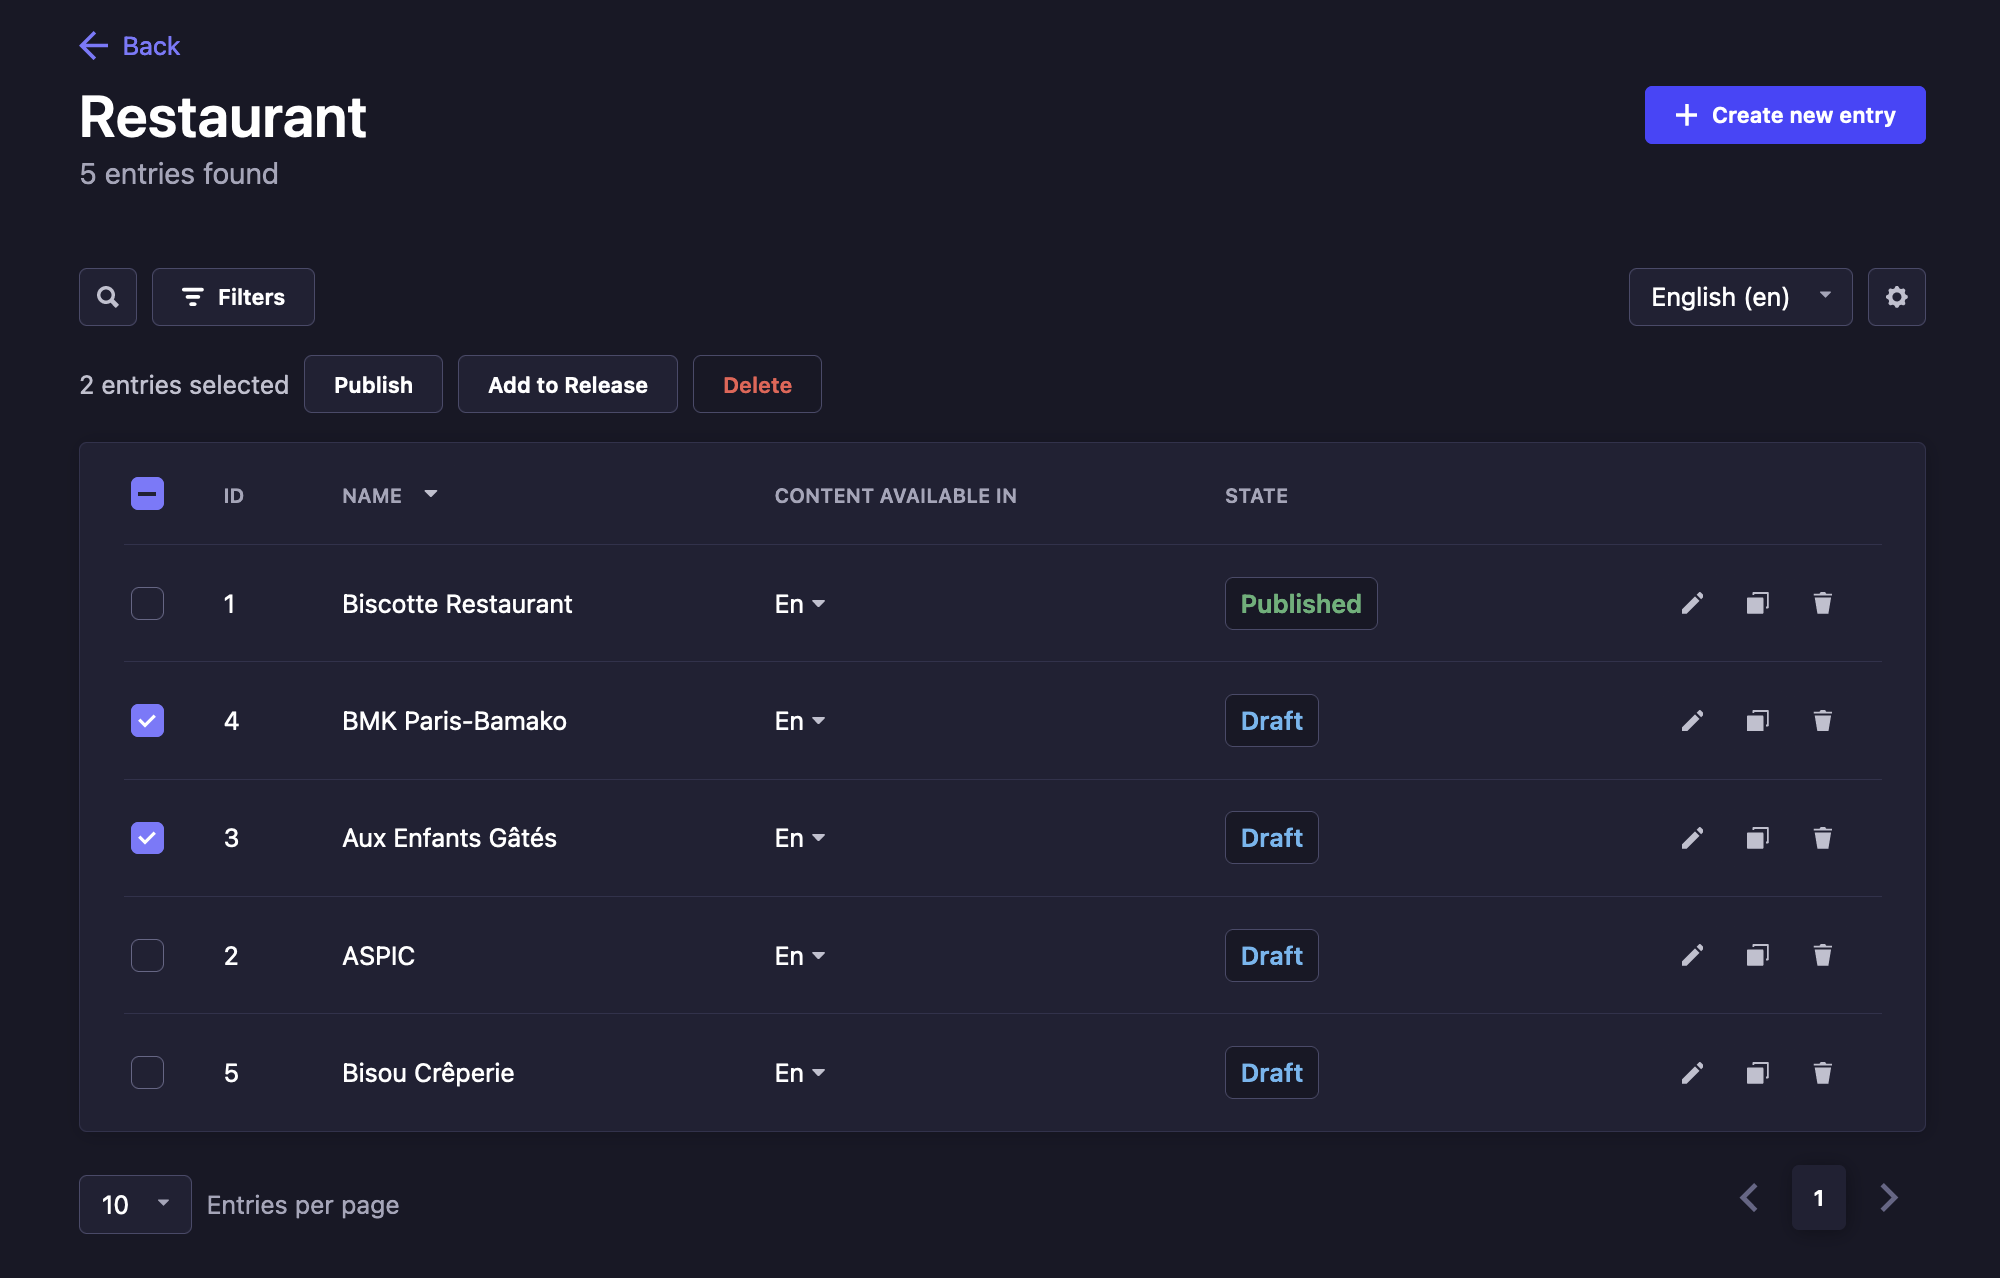
Multiple entries at a time
Path: List view of the Content Manager
- Select which entries you want to add by ticking the box on the left side of the entries' record.
- Click on the Add to release button located above the header of the table.
- In the modal, select which release to add these entries to.
- Click on the Publish or Unpublish button to decide whether these entries will be published or unpublished when the release is published, then click Continue.
Removing content from a release
Path: Edit view of the Content Manager
- In the Releases box in the right sidebar, click on below the name of the release.
- Click the Remove from release button.
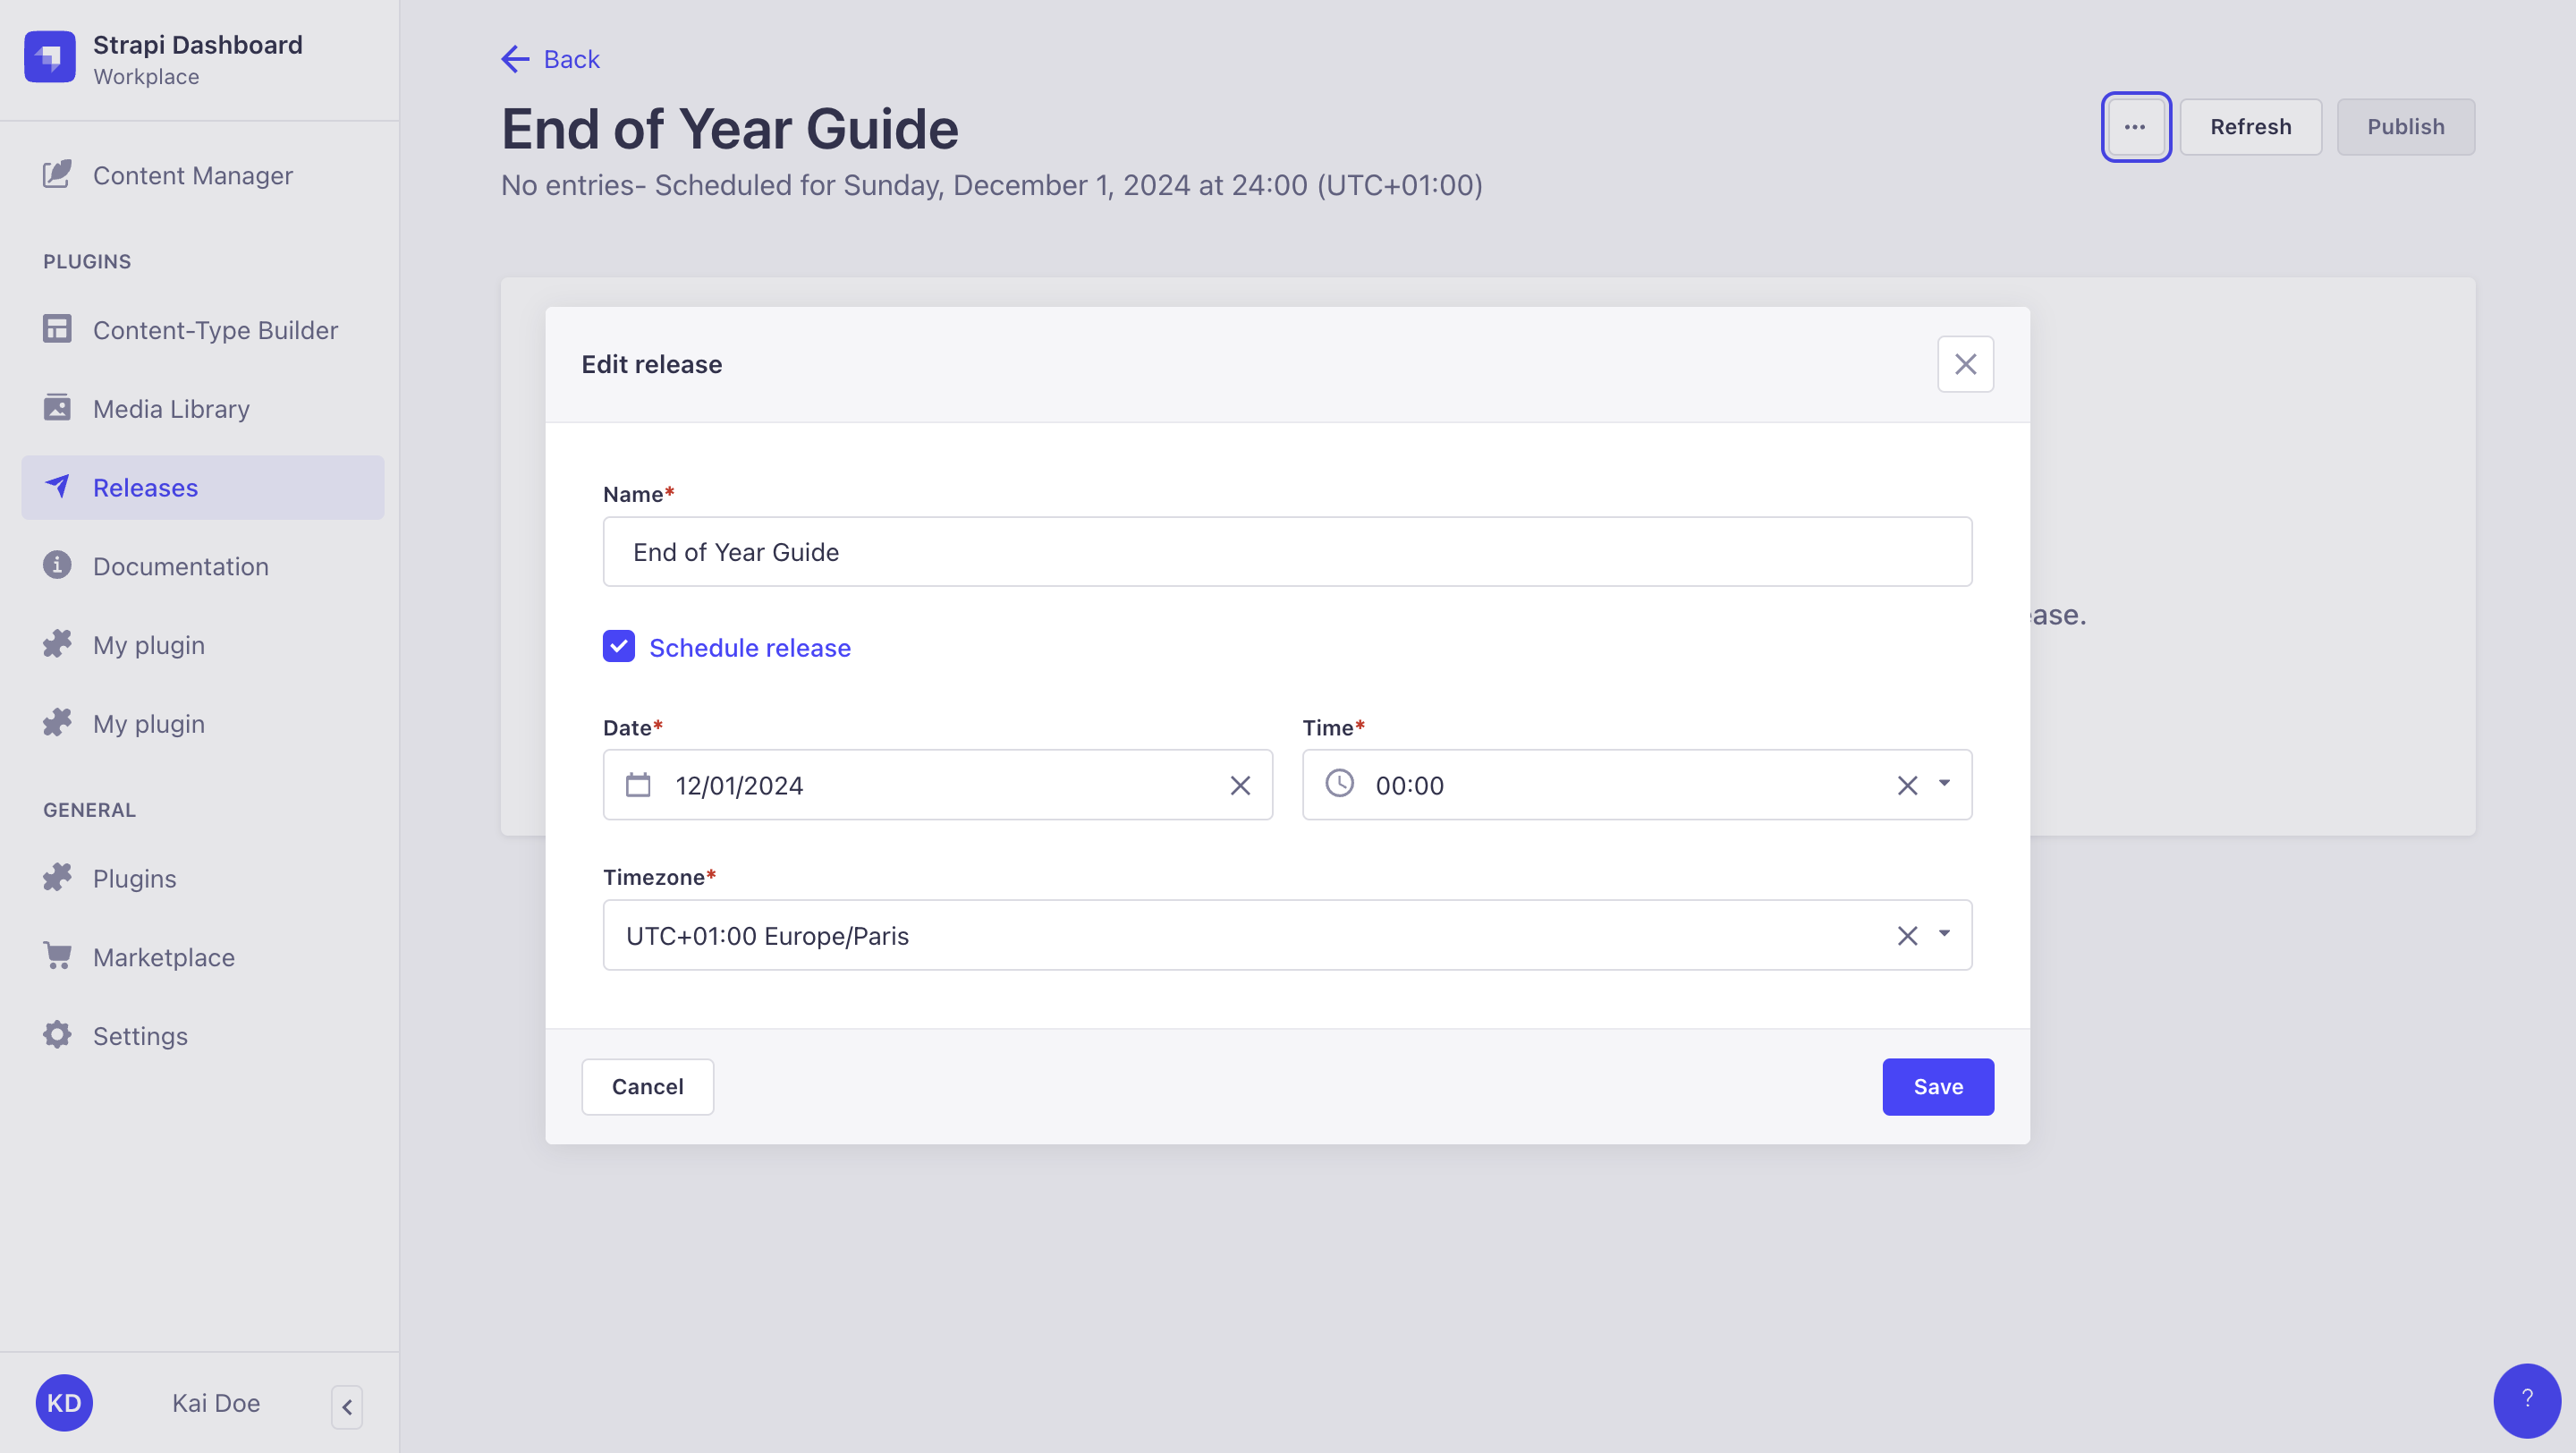
Scheduling a release
Path: Releases
Releases can be published manually or scheduled to be automatically published at a given date and time, with the timezone of your choice.
You can schedule a release:
- when creating the release,
- or once the release is already created, by editing it.
To schedule an existing release, while on a release page:
- Click on the button in the top right corner of the admin panel.
- Select Edit.
- In the modal, check the Schedule release checkbox.
- Select a date, time, and timezone for the release to be published.
- Click Save.
Publishing a release
Path: Releases
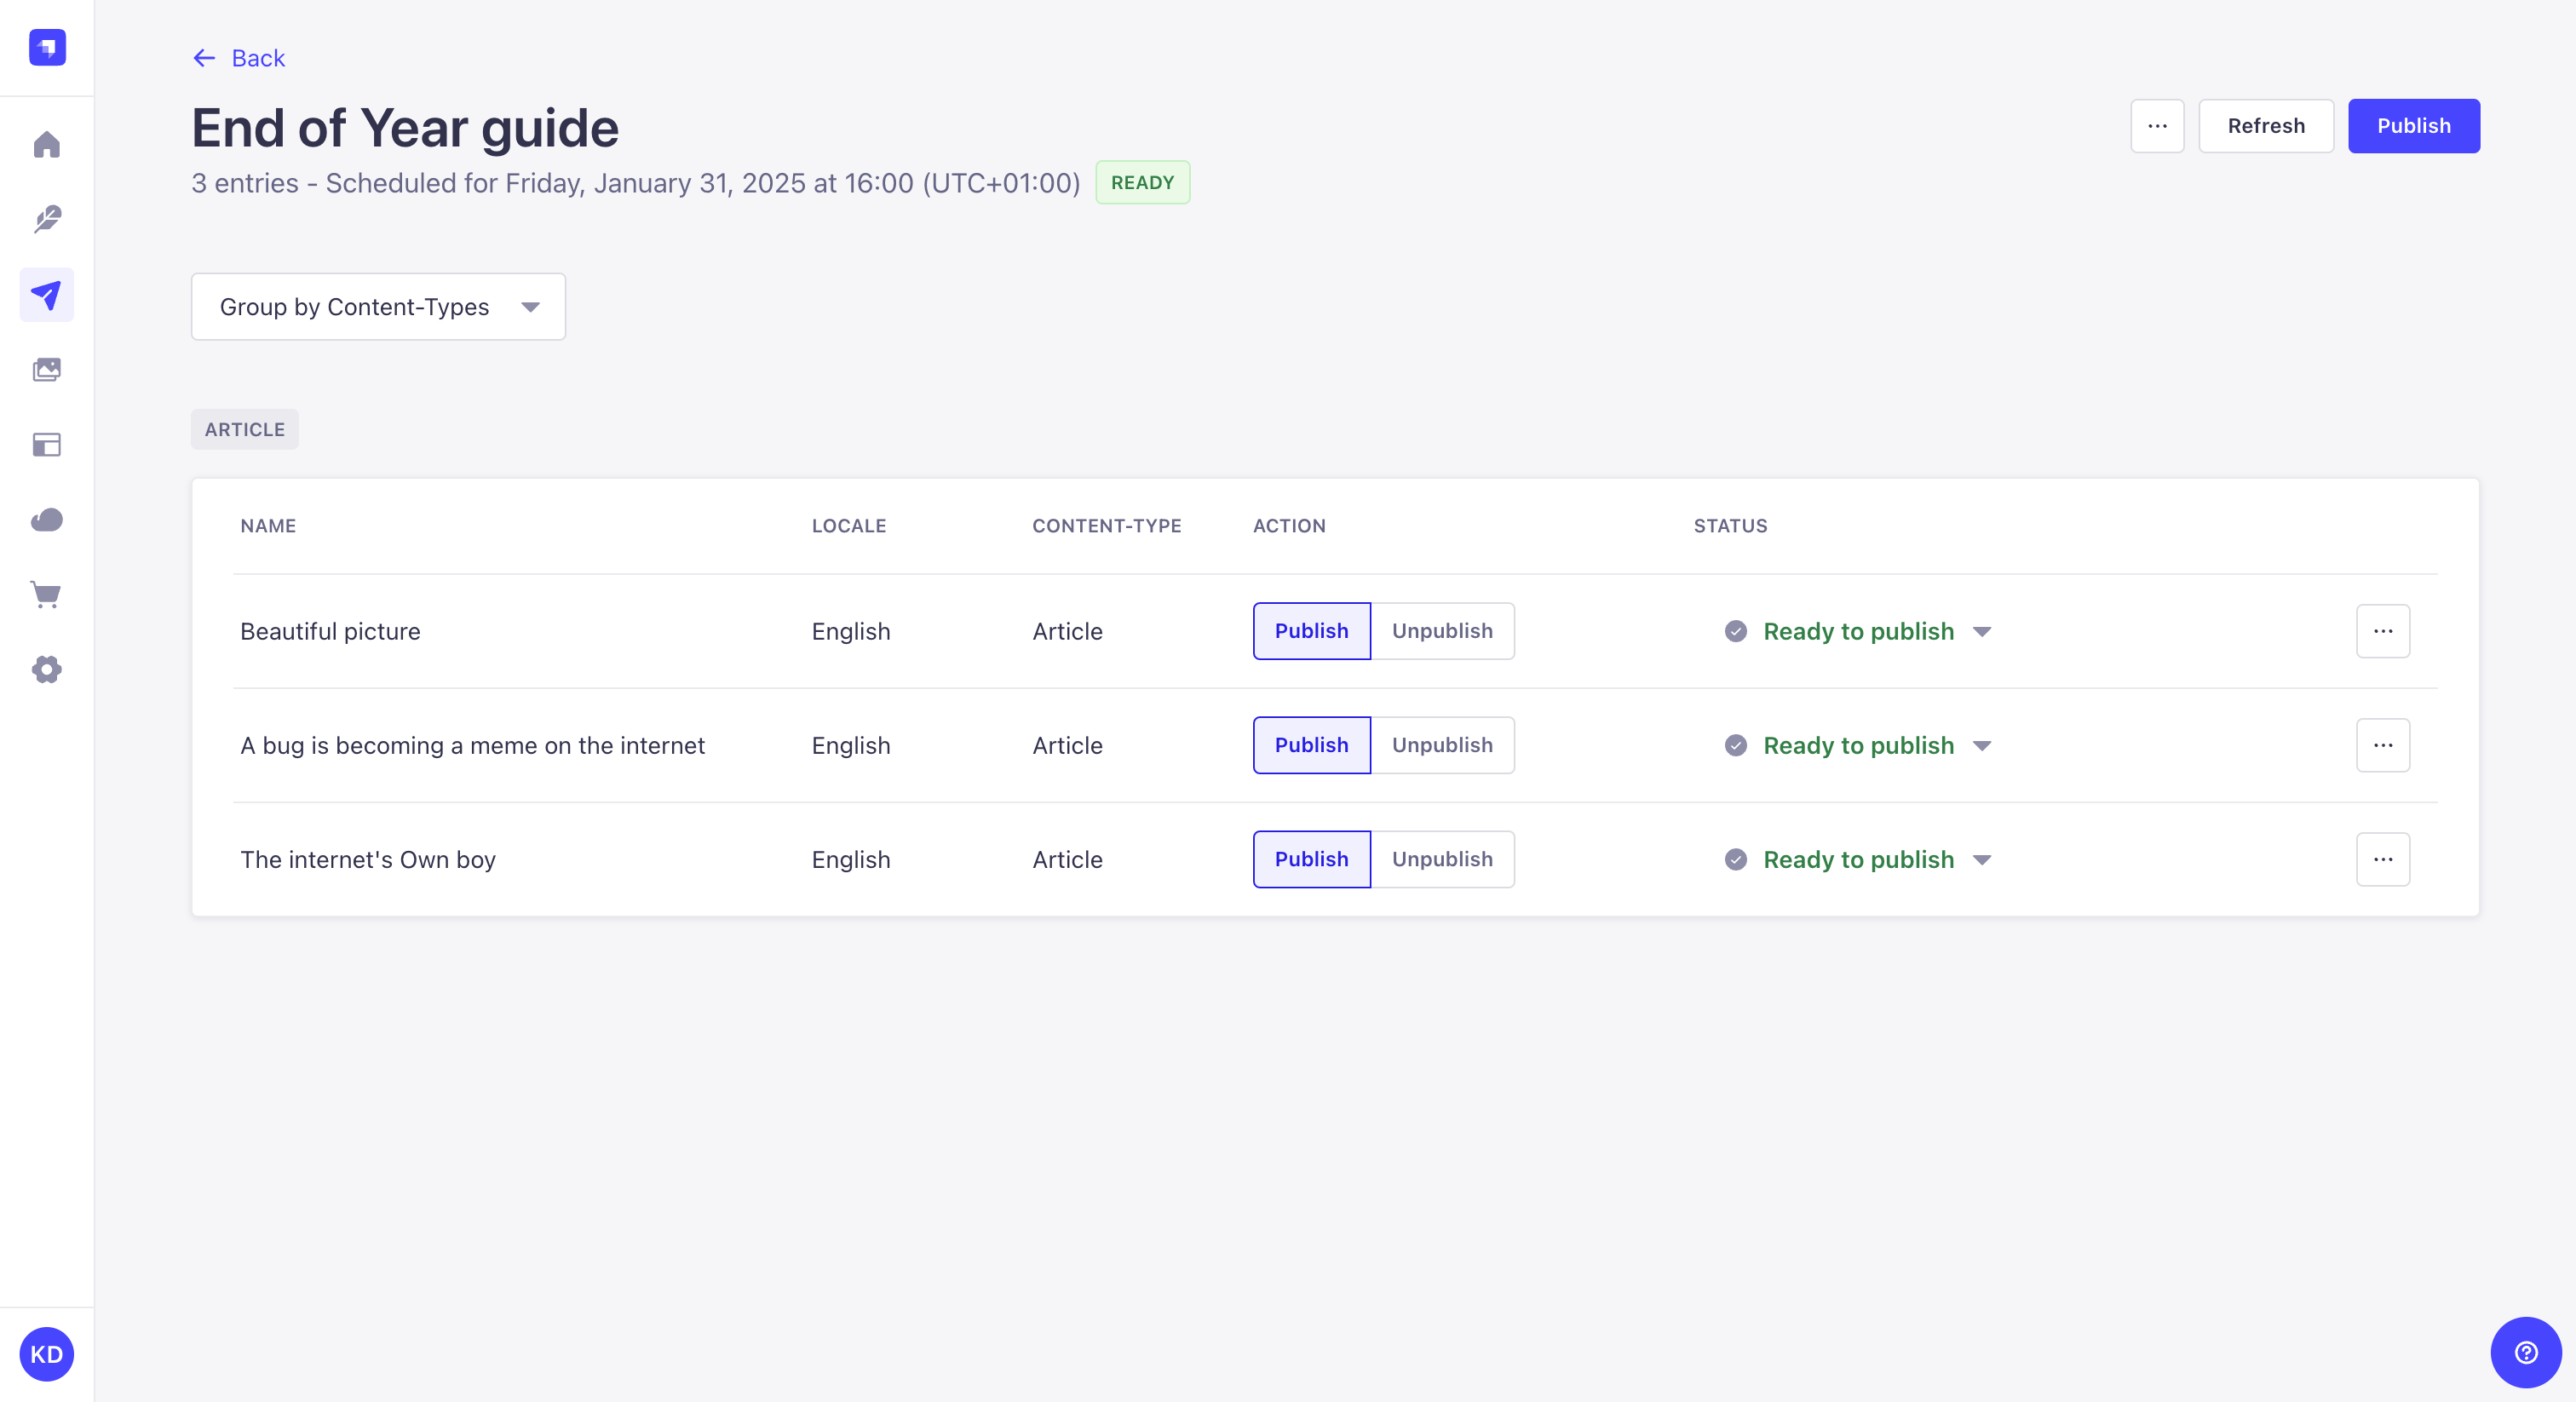
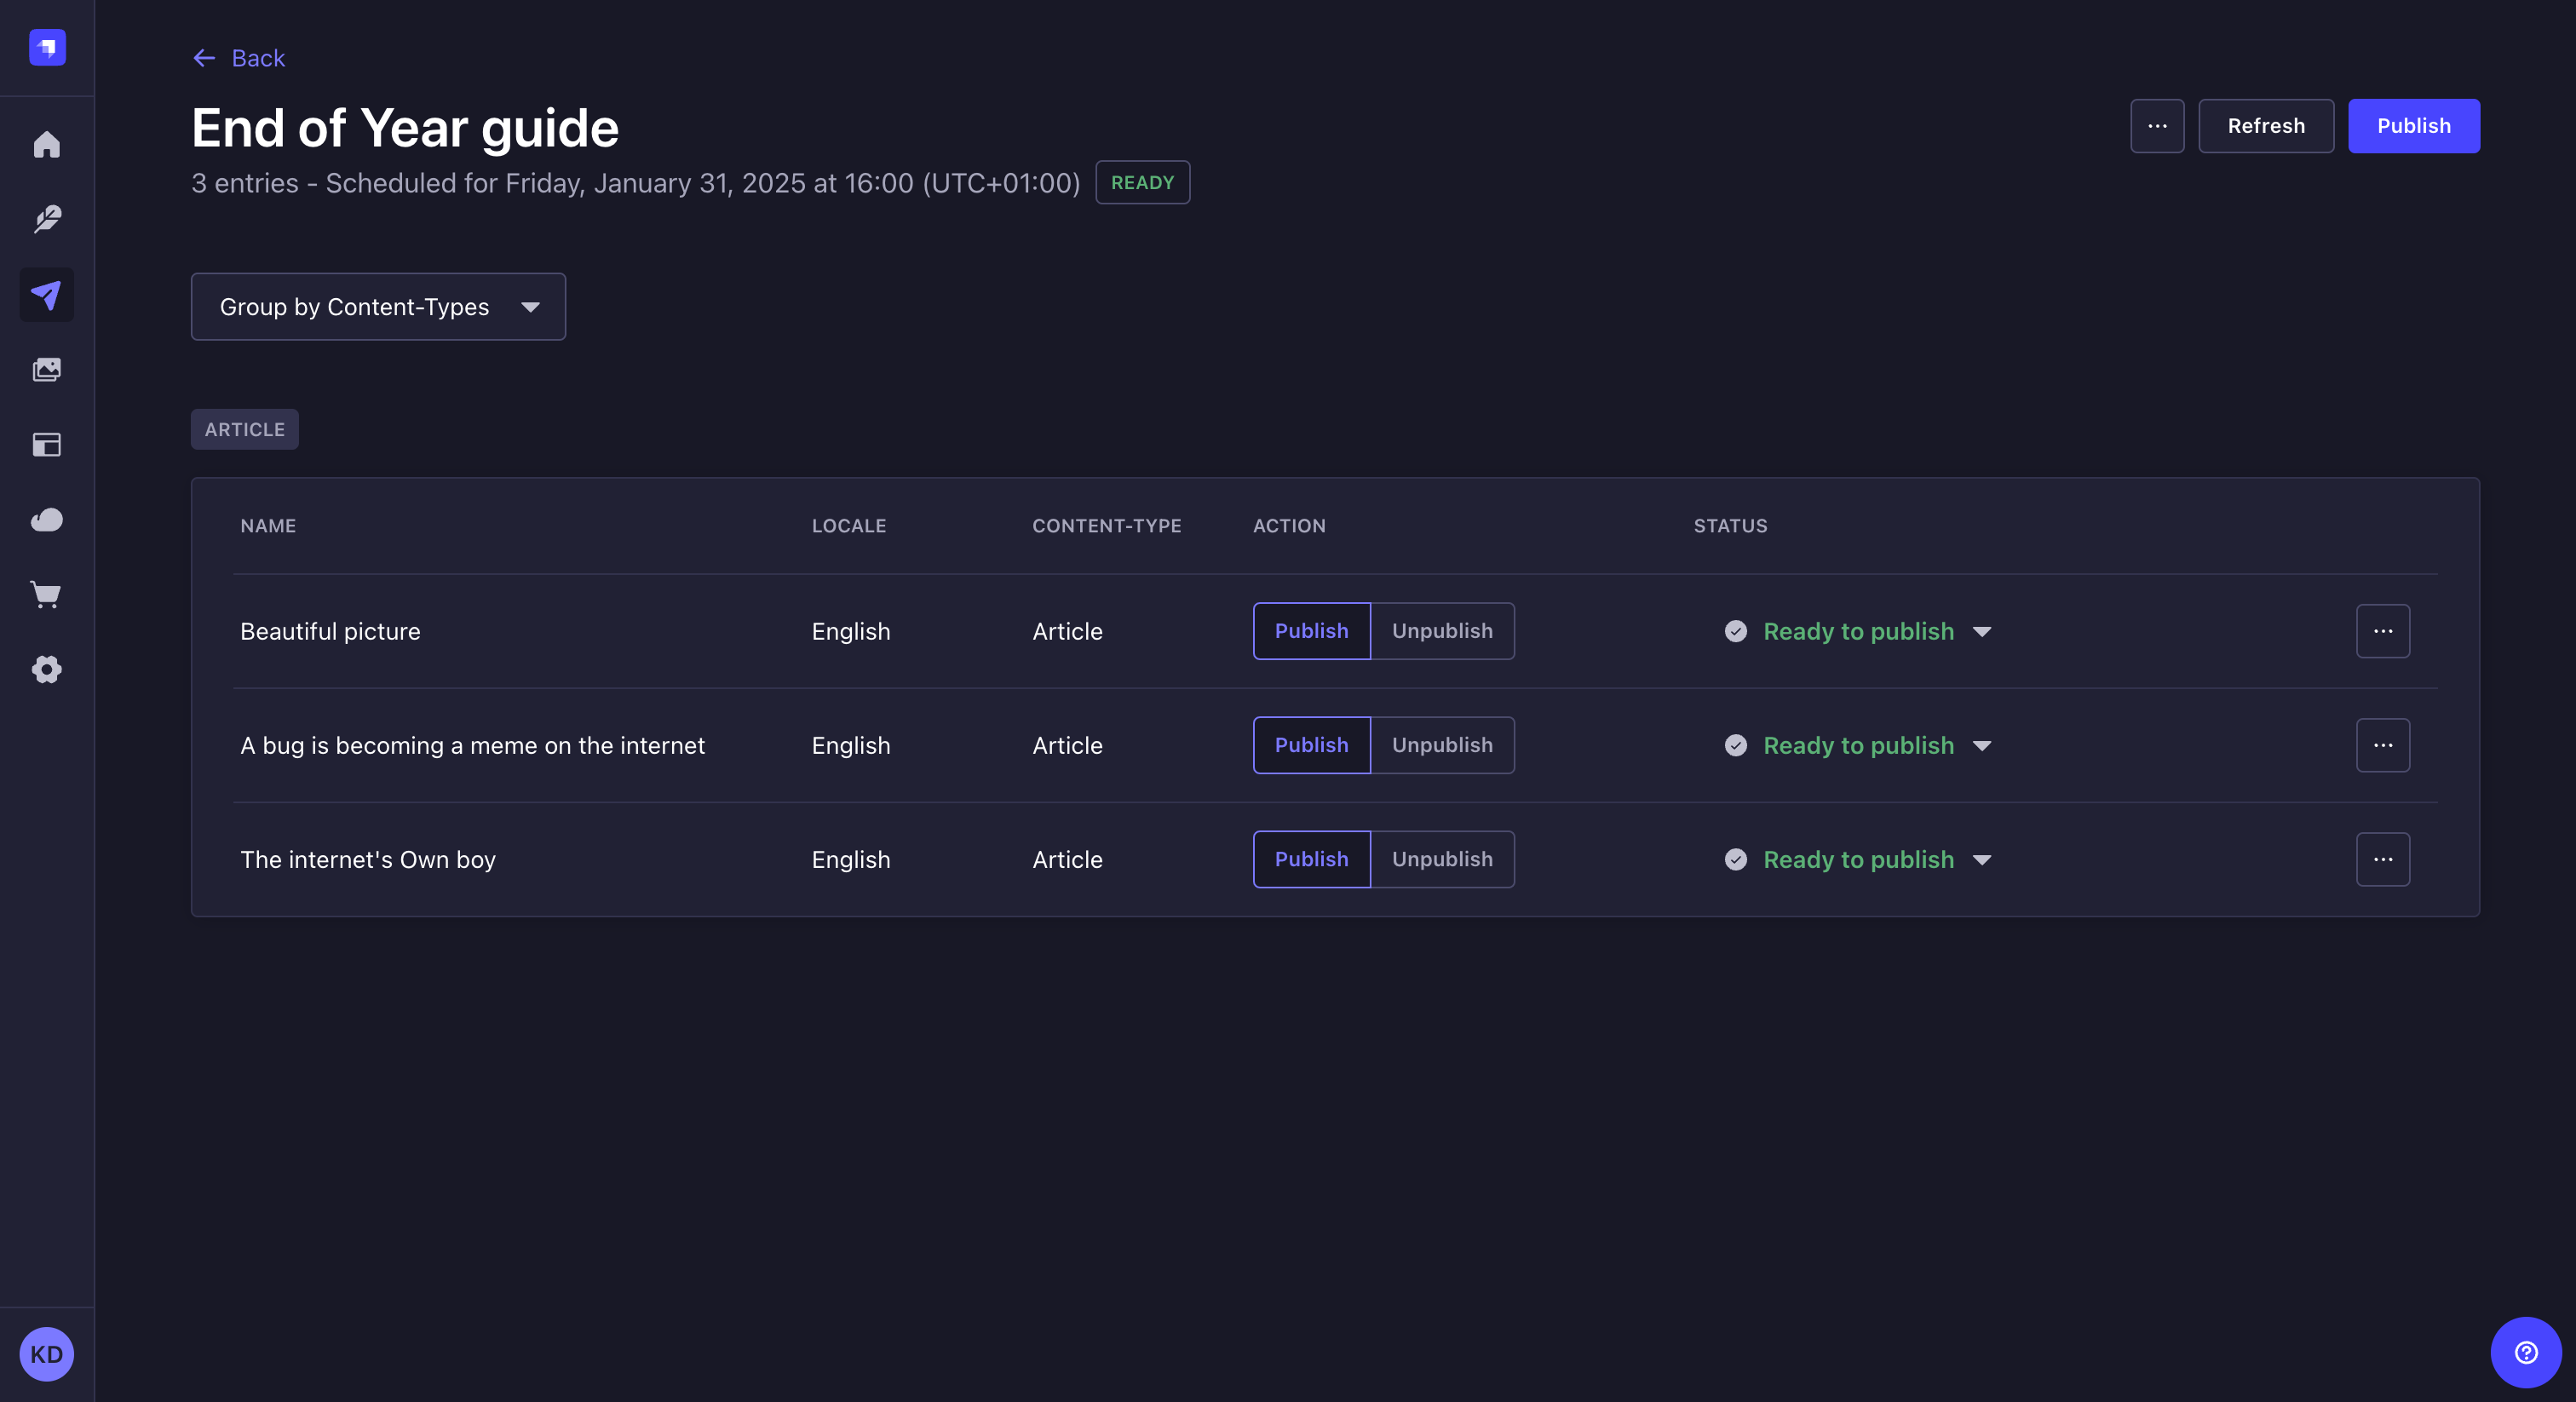
Publishing a release means that all the actions (publish or unpublish) defined for each entry included in the release will be performed simultaneously.
To publish a release, click the Publish button in the top right corner of the admin panel. Before, make sure to check the status of both the release and its entries.
-
A badge at the top of the interface indicates the status of your release:
Empty: no entry has been added to the release yetBlocked: content has been added to the release but at least one issue in an entry prevents the release from being publishedReady: content has been added to the release, all checks have been passed and the release can be publishedDone: the release has been released and is now done
-
The Status column displays the status of each entry:
- Already published: the entry is already published and publishing the release will not affect this entry
- Already unpublished: the entry is already unpublished, and publishing the release will not affect this entry.
- Ready to publish: the entry is ready to be published with the release
- Ready to unpublish: the entry is ready to be unpublished with the release
- Not ready to publish: the entry cannot be published because some fields are incorrectly filled, or it hasn't reached the required stage for publishing. In this case, the release will be indicated as Blocked until all issues have been fixed.
If your release is Blocked because some of your entries have a status, click the button, then Edit the entry to fix the issues until all entries have the status.
You will have to click on the Refresh button to update the release page as you fix the various entries issues.
Once a release is published, the release itself cannot be updated. You can not re-release that specific release with the same group of entries with some modifications; you must create another release.